We’re going to cover the mechanics of how to hit an effective slice return on the forehand side in seven simple steps that you can use again and again against any serve that comes your way.
You’ll want to know this so you can land your return deep in your opponent’s court every time as well as comfortably transition to the non-volley zone line behind it and take charge of the point.
Step #1 – Split Step
Let’s look at Kady’s forehand slice return. (refer to above video at time marker 0:45)
First off notice how she does a solid split step while her opponent is striking the ball and by the time her feet hit the court she knows where she needs to move to.
In this case, on this shot, it came more or less right to her, but you just never know which is why you always want to hit that split step.
A strong split step, in a good ready position, with paddle ready, is always the first step to any successful shot whether you ultimately must move very far to hit it or not.
If you’ve been watching PrimeTime videos for any length of time at all then you’ll notice, we bring this up repeatedly because it’s so very important.
Having no split step is one of the biggest mistakes we see at the recreational level.
Next up is what to do with your hands.
Step #2 – Ready Your Hands
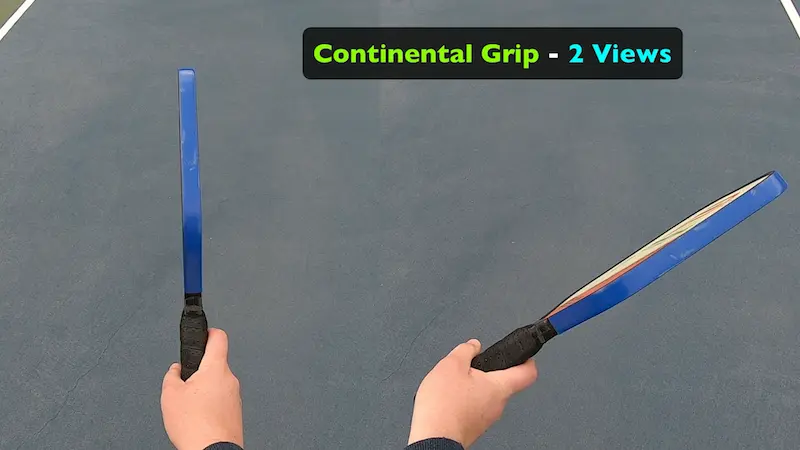
You’ll be using a continental grip on your paddle hand for this shot as she does here.
Once you see that it’s coming to your forehand side, unless you’re already in a continental grip, which you may already be, and we’ll get to that in a second, chances are the next most likely grip you could be in is an eastern forehand grip.
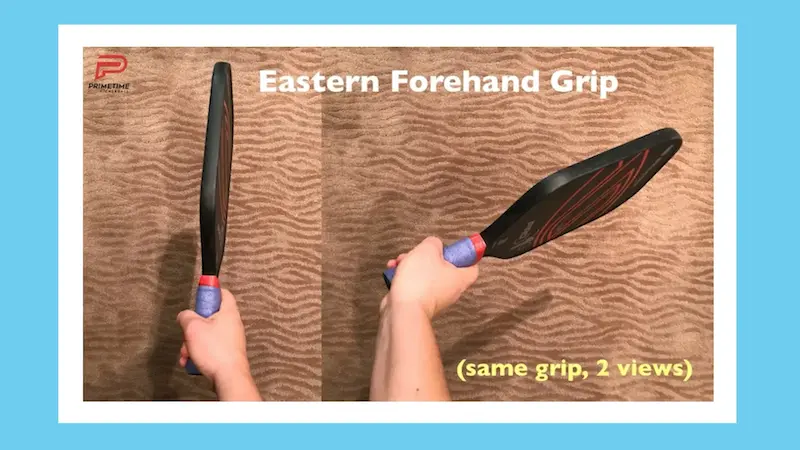
You’ll use your left hand to rotate the paddle slightly and set a continental grip for your right hand or your dominant hand.
It’s vice versa if you’re a lefty. You’ll use the right hand to set the correct grip for your left hand.
Refer to video at marker 2:16 to see a live example of the grip switch from an eastern to a continental.
Many players, including myself, will often hold a continental grip as our ready position grip when we return since we’ll often be hitting a slice return and that’s a good grip to use on the slice for both the backhand and the forehand side.
Notice her offhand on the image below which is the hand the paddle is not in, so in this case it’s the left hand. Notice how it’s on the throat of the paddle.
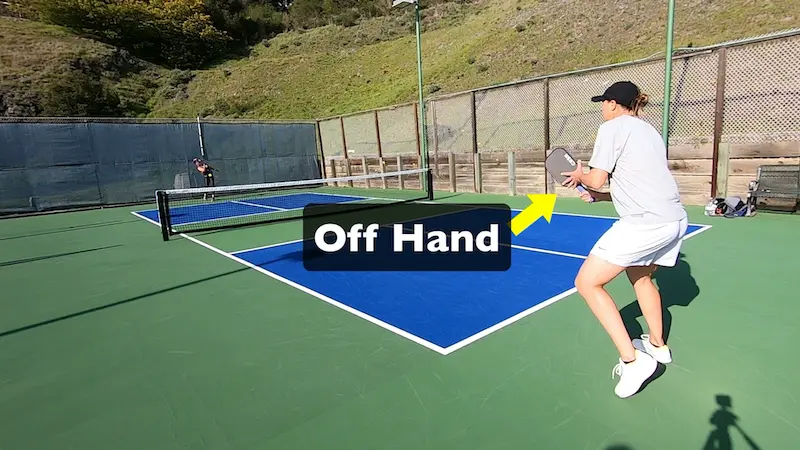
The off hand and the arm is often overlooked but it is an important part for not only helping you to position the grip well for your dominant hand, but also for keeping your body engaged and stable before, during, and after contact.
It has a less obvious but an impactful job to do at every stage of the stroke.
We’ll keep coming back to what to do with the off hand and the off arm throughout the swing so look out for that.
Step #3 – Good Spacing
Let’s unpack this one.
Refer to time marker 3:15 to see live examples of the scenarios described below in the next few paragraphs.
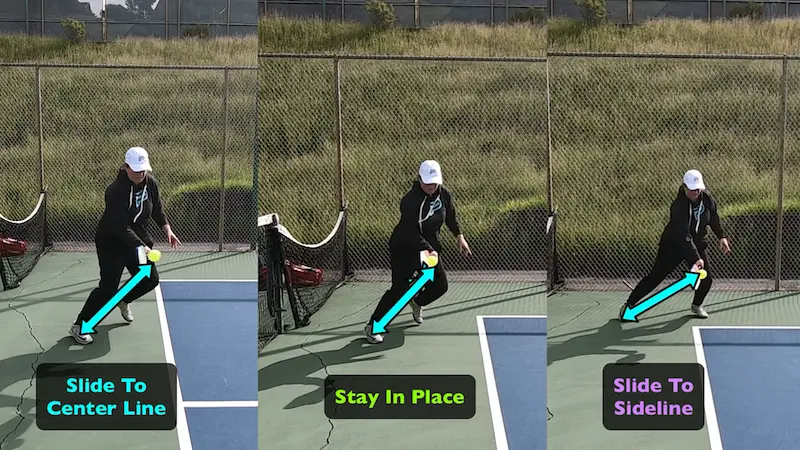
Notice how her foot pivots first and then moves into the position she wants to create good spacing with the ball by the time it gets to her.
In this case she slides it towards the center line to get out of the way of the ball that is coming more towards her.
On this one she pivots it pretty much in place.
And on this one, she takes a step towards the even side sideline to get a bit more behind it since it’s headed a little bit more away from her.
Notice how in all cases, by the time the ball is being struck, the spacing between the back foot and the contact point is very similar.
This is crucial to creating a stable and consistent stroke that is repeatable and has as much of the same feel as possible from stroke to stroke.
There’s an acceptable range to this but your goal should be to keep this as similar as you can from shot to shot.
Creating this consistent spacing is not discussed much but it is vital to strong shot making.
It’s part of the secret sauce to why top level players are so good and have consistent and repeatable shots.
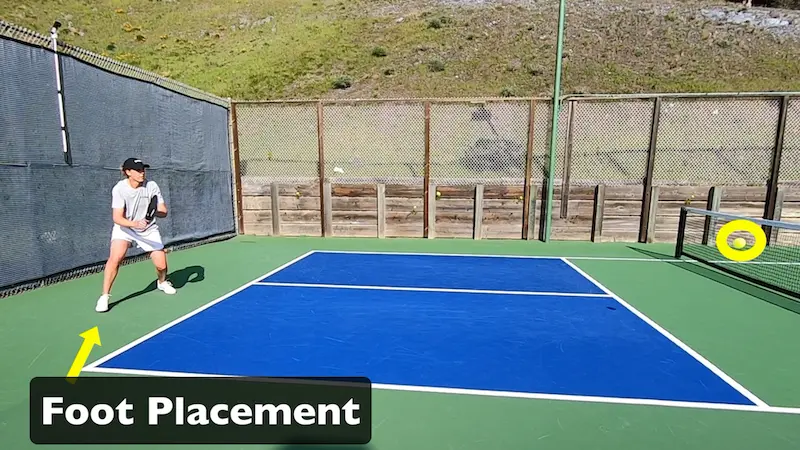
Refer to time marker 4:39 for example of scenario described below
Notice here how far the ball still is from her at this point. It hasn’t even bounced yet but somehow, she already knows that she wants to put her foot here so that by the time she is making contact she has strong spacing from the ball that still allows her space to transfer her weight into the ball all while still contacting the ball in front.
This is not magic, but it is an elusive thing to many and it only comes from one thing and that is training and the repetition of seeing many different speeds, heights, depths, and spins on shots that come at you.
Over time you will develop an understanding of how to read the shot and in turn how to position yourself to allow for all this good spacing to happen.
You need more space than you think. Most players let the ball come in too close and don’t leave themselves enough room to step in and still hit it out in front all while still having a relaxed motion and allowing the arm to swing freely.
Getting this spacing right is the key for the next parts of your stroke to go off smoothly.
If you think this is something you struggle with, you’ll really want to look at it and tackle it.
As you pivot and position that back leg, that leads you right into point number four.
Step #4 – Load, Turn & Coil
These three things happen very closely together and work together in harmony, so we’ll cover them together.
You’ll bend your knee to load up the leg, turn and coil your hips and shoulders, then your off hand will separate from the paddle and be across your body pointing roughly off to the net post on the right or it can even be more across your body pointed more directly towards the sideline.
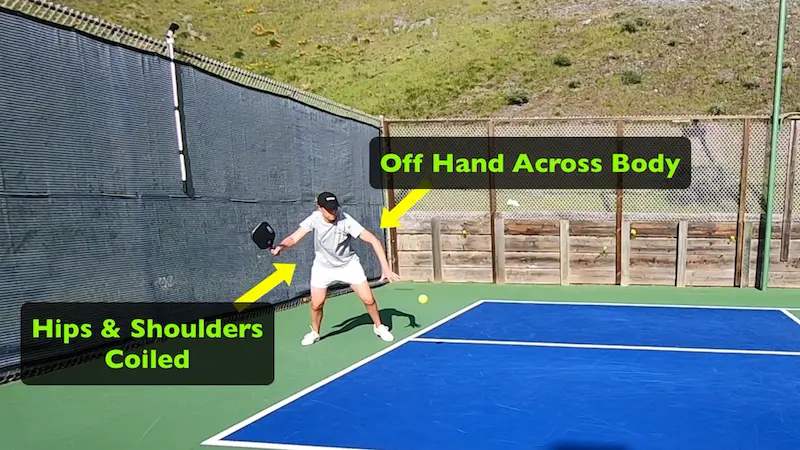
There can be some variation at where it’s pointed, and that’s perfectly fine, but it should be engaged and directed towards the side and coming across your body.
Your arm is involved in the shot and helping you get your body well positioned for the swing.
Since this is a slice return you can more easily, and will want to, create some time as you move up in the court to the non-volley zone line.
You won’t want to hit this at max speed.
For this reason, you’re not going to need to get as fully coiled in your hips and shoulders as you could and as if you were trying to strike a big power ground stroke.
But still, you want to use your body to hit that shot so you do need to get turned and coiled up.
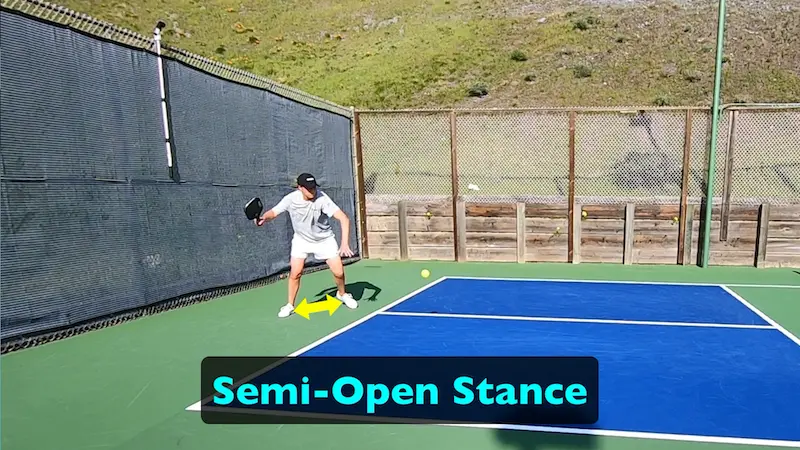
You’ll use a semi-open stance which means your feet will be at an angle roughly like this.
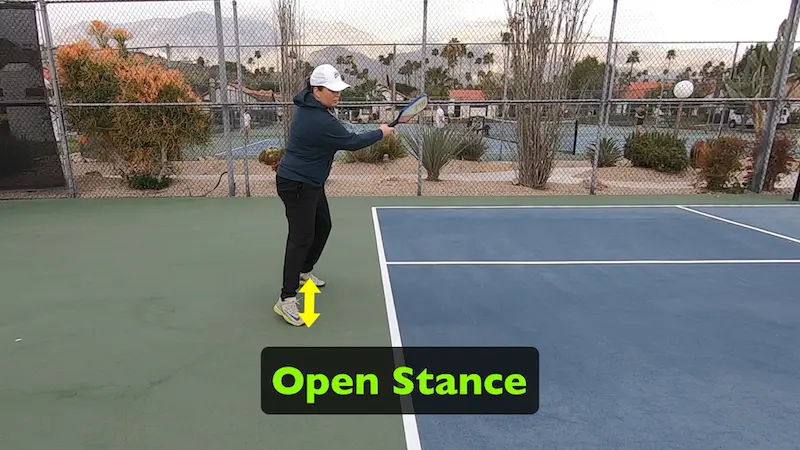
Open stance would be with your feet positioned more parallel to the baseline.
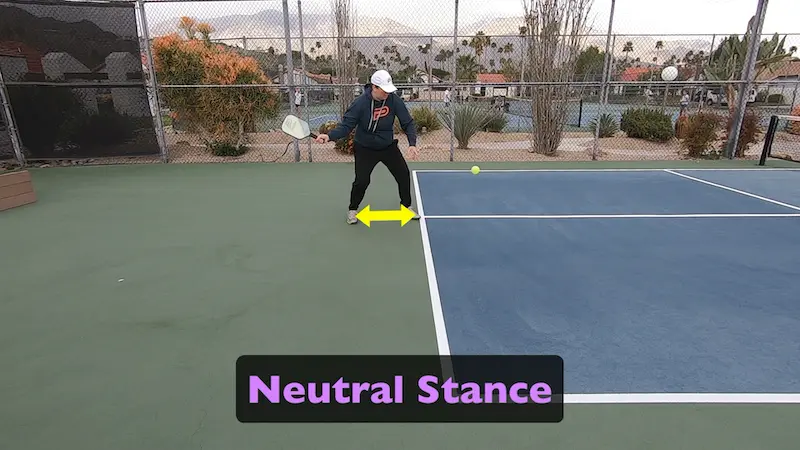
Neutral would be a directly forward step with your feet lined up more perpendicular to the baseline.
The semi-open stance is good for this shot since you’re going to bring that right leg forward because you’re going to use that to run towards the net, so it creates some space for that right leg to come through while still hitting a good shot as you do it.
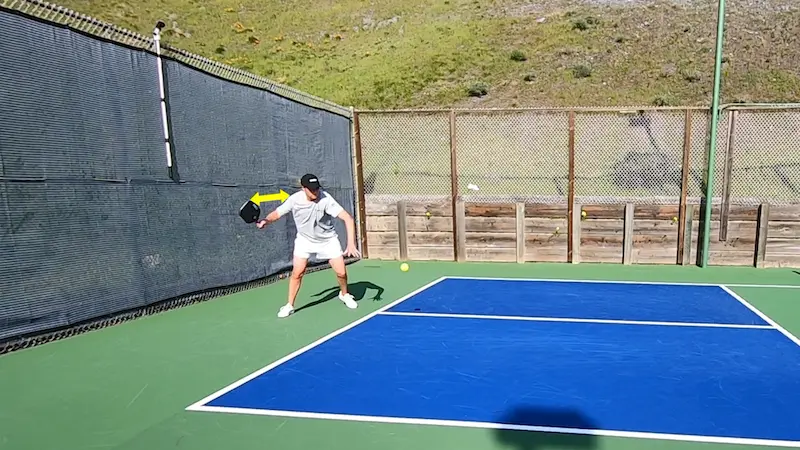
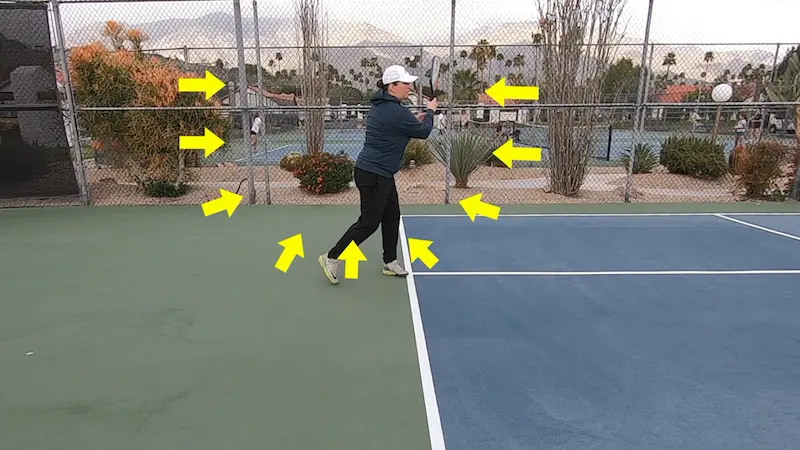
Refer to time marker 4:47 to see visual of below scenario
Notice how the paddle got back mostly from the shoulder turn in the previous step and there’s actually a very small take back with the arm itself.
Having a big backswing is in large part an illusion.
The turn and coil takes care of most of that with just a small set with the arm.
Notice how her hitting arm doesn’t point directly towards the back fence and it’s pointed more towards the back side corner. She has quite a compact swing on this stroke.
The incoming shot already has a good amount of pace on it and she’s going to move into the shot as well.
It’s more of a send back rather than a big strike back like a power forehand drive would be.
Having a compact backswing is preferable.
The paddle is roughly shoulder high at the end of the back part of the motion.
Step #5 – Drive Right Hip Forward & Shift Weight To Other Leg
You’re going to lean into that shot so that immediately after you hit it, you’ll use your momentum to help you cover some ground.
You’re going to want to clear your off arm out of the way by either gently moving it off to the side or tuck it in more towards your body.
The hip uncoiling is what will send the shoulder and your swing motion forward yet in a downward trajectory towards your contact point.
Step #6 – Critical Actions At Contact
There’s a lot of important things happening at contact.
The contact point is in front, the paddle face is slightly open and your paddle is level with your hand.

Most players learning the slice think that the paddle face needs to be a lot more open than it does and that’s why they tend to send it more up than they would like.
If you want to send it mostly forward but still with backspin on it, then it’s not really that open at contact only somewhat.
To get the underspin rotation on the ball you want to think that you’re stripping some plastic off the ball.
Imagine that the ball is an orange and you’re trying to strip the peel off.
Your paddle still must grab quite a bit of the ball but the power line or energy line you are sending through the ball is not going directly through the center of the ball as it would on a pure drive.
The paddle face needs to have enough friction with the ball to impart the spin yet make enough contact with the ball to send it forward.
Step #7 – Finishing Actions
The total swing motion has made a “U” shape as you get through contact, extend well through contact, and finish out in front and then slightly over towards your left shoulder.
As mentioned, you still need to get through the ball quite well which is why you’ll have a more extended finish, but you won’t typically wrap it around your left shoulder like you would on a drive or a topspin since it’s more of a medium pace swing and doesn’t need as much space to decelerate.
Your back leg will come through and forward and you’ll be in great shape to continue your advance towards the non-volley zone line all while hitting a dynamically balanced shot.
Conclusion
Are you benefiting from a strong forehand slice return?
A great way to find out if you’re hitting your shot well is to take video of yourself hitting the same shot from the same angle you’ve seen here and to compare them.
It’s easy to do on just about any smartphone and it takes only a few minutes.
You’ll get a lot of great feedback and likely gain some insights on how you might hit your shot better.
In this video/blog we covered the mechanics of a slice return but if you want to know exactly why a slice is such a great choice as a return then we have a whole video going into detail on that – click here to access video.
Let us know in the comments of the YouTube video what you think of the forehand slice return as a pickleball shot and if you’re using it in your game.
If you are, how’s it going?
If you’re not, why not?
We’d love to hear from you.