Although the serving team does have first strike of the ball the two bounce rule quickly turns that around and gives the returning team the ability to capture the net first.
If they’re smart they’ll take advantage of that every time.
Strong serves will certainly help you out by producing weak returns and/or more difficult trips to the net for the returning team.
Yet, the reality is, as the serving team, you will often end up in a more defensive situation as your team is likely too back and the other team is too up or about to be as the returner makes their way up to the net.
It’s very important that you handle that third shot in a particular way so that you can end up on offense soon rather than scrambling on defense.
It’s important to note that the drop is not always the best answer.
So, what do you do with the third shot to neutralize the other team’s advantage as quickly as possible and begin mounting your own attack as a team?
Well, it all depends on the return.
We’ll advise you on what to do depending on what return comes your way.
You can drill with just two players using half of the court but the same would apply if you were using the full court with four players.
We’re going to go over the three ways to transition from the baseline to the non-volley zone. This is specifically referring to when you or your partner is serving.
Because of the two bounce rule you have to stay back, wait for that return to bounce and then you and your partner can then hit and make your way and transition to the net.
This is one of the hardest things to do when you start pickleball. It’s really hard as you move in levels because the players are so tough at the net. However, these are the three ways that we like to consider to chose from when transitioning to the net.
Option #1 – Work Your Way In
The very first way we like to do it is to work our way in.
You’re going to hit your third shot, come in a bit and then you’re going to hit the split step. Keep in mind you don’t want to be moving while your opponents hit the ball at you.
You want to make sure you’re set so that you could go left or right and be ready for any ball.
As you hit that reset, mid ball/neutralizing shots, into the kitchen, you’re going to be coming up more as soon as you can until you hit that non-volley zone line.
Use this way when the return was good & presses you or if your drop was so-so.
Get up as much as you can between each shot before your opponent makes contact.
You’ll probably be hitting two to three transitional shots in this area to get up to the line from where you could then try to dominate from the net.
This is the very first way to move up which is working your way in with split steps, making sure you’re stopped before your opponent hits the return.
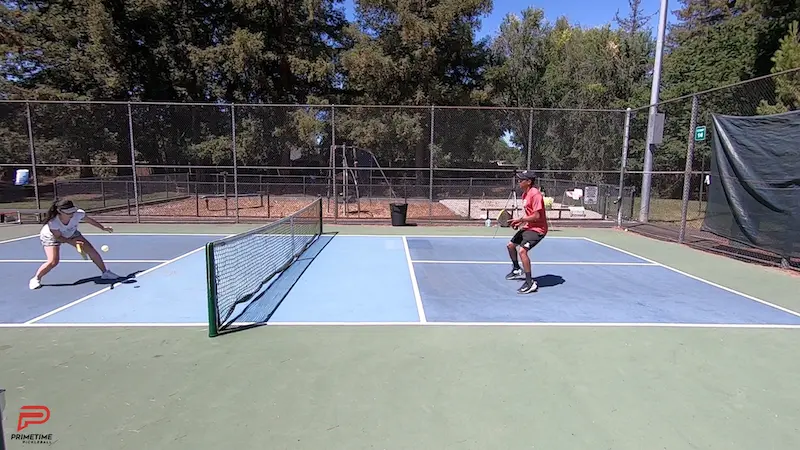
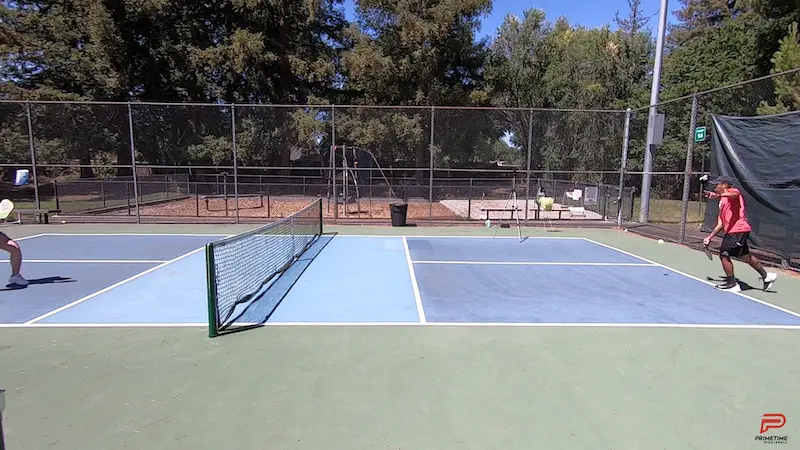
Let’s describe a live play situation – Jordan serves and then Katrina’s return pushes Jordan back behind the baseline. A good drop is possible but tough from so far back.
Jordan hits a really solid drop but will not be able to get up to the non-volley’s zone line before Katrina makes contact with the ball since he started from so far back behind the baseline. Because of that Jordan hits his split step well back in the court so that he can push off and head in any direction the ball goes.
In this case, because his drop was quite good, he has bought himself a relatively easy fifth shot with which he can continue his progression to the net.
A lot of times your third shot may sit a little high or it might not be quite as perfect as you want it. But, what you can do after you hit your third shot is to move into the court and give your opponent less court to work with.
If you’re all the way back, your opponent has a lot of court to hit in but as you close this angle off you could kind of control it from mid court.
Move a little bit closer and control it and then soon you’ll be up at the net. This puts a lot of pressure on your opponent.
If you have those soft hands you don’t have to rush to the net, you can just work your way in.
So, that’s the first way that we like to transition from the baseline to the non-volley zone.
Option #2 – 3rd Shot Drive
The second way we like to transition from the baseline to the non-volley zone is by using the third shot drive.
There’s a few advantages to this shot.
Sometimes you could just win some free points off it if your opponent’s are still making their way in after the return or they’re just missing volleys.
You could also win some good points if you hit that third shot drive nice and low that in turn cause you opponents to hit a weak volley which gives you an easy fifth shot drop that you could easily hit from mid court and then work your way to the non-volley zone.
We’ll describe a live situation now – Jordan hits a drive from deep in the court and manages to keep it low. That’s what you want. Jordan’s goal is to generate an easier fifth shot drop. His goal is not to hit a winner. He is seeking to force a low contact point and neutralize the good return. He is not attacking.
In the example prior to this one, Jordan’s third shot drive was very low which is ideal if you have that level of precision with your drives. But, you are flirting with the net somewhat hitting it that low from so far back. In this example, his drive was not as low yet it was good enough, likely due to its speed, to still produce a manageable fifth shot drop with which he could still proceed to the net.
A third shot drive that is just “so so” typically has a smaller downside than a drop that is “so-so”. With the drive, the opponent still has to deal with the pace of the shot whereas a mediocre drop just kind of sits there and is often begging to be attacked.
In this example, Jordan has a third shot on his forehand side that he can step into really well as the return isn’t really pressing him. He feels confident taking the shot offensively, so he does, yet his goal is still to generate an easier fifth shot drop.
If it becomes a winner or produces an error that’s great but it’s not the goal.
Option #3 – Hustle To The NVZ Line
The third way which we like to transition from the baseline to the non-volley zone is right after we hit our third shot drop. We’re going to sprint and rush the net so that we could put a lot of pressure on our opponent up there.

We only do this when we know and we feel off our paddle that we hit a great third shot, we got it down and we could make sure our opponent’s contact point is low.
You’re going to be sprinting really hard.
This will make it tough for your opponent to decide what to do with that ball.
It’s going to really put a lot of pressure on them and hopefully they could make an error or they could even pop it up and you could either close on that ball or your partner at the net could also poach on that ball.
Conclusion
Those are the three main ways that you can effectively transition from the baseline to the non-volley zone line.
Mastering your transition will put tremendous pressure on your opponents as we described in the examples. Which one you use will depend on what situation you find yourself in.
It’s important to be selective about how you handle your third shot and adapt accordingly so that you can end up on offense as soon as possible and start stacking up points as the serving team which of course leads to winning more games.