Do you struggle with your 3rd shot drop on the backhand side?
Many have a much harder time with their 3rd shot on the backhand and prefer to take most 3rd shots with their forehand.
However, to be a complete player and advance as far as you can with your skill in pickleball, you will need to develop a reliable 3rd shot drop on the backhand side.
Most opponents aim for the backhand because they know that, more often than not, it’s the weaker side, so it’s important to make your backhand as strong as it can be.
We’re going to go over the backhand third shot drop, how to hit it, the appropriate footwork to use ,and ways to make it easier to be in a good position.
One thing I like to do when I’m starting off helping people with their third shot drop on the backhand side is I really want highlight that it’s important to realize that we’re not hitting it like it’s a regular groundstroke. This means that there’s not a full swing involved.
It’s very much a control shot we’re hitting here and you’ll want to make sure you’re stopped, set, ready, and balanced as best you can during your execution on the backhand 3rd shot.
And, that it’s a nice smooth low to high motion just like a dink. In fact, it’s very similar to a dink so I’m going to show/describe to you how that works and how you can use your dinking technique to inform your 3rd shot.
As I dink here with my partner across from me, there’s a few components that are really important when you’re hitting a backhand dink or backhand third shot.
Form
First, we’re going to make sure that we get that paddle face started down low and then we’re going to end high. It’s more of a push motion.
We’re lifting that ball up, making sure that we clear the net with enough space. That’s the number one thing that we want to do, especially when we’re hitting soft shots from the baseline like the third shot drop.
We really want to clear that net and get that ball arcing up and over before descending as it crosses the net.
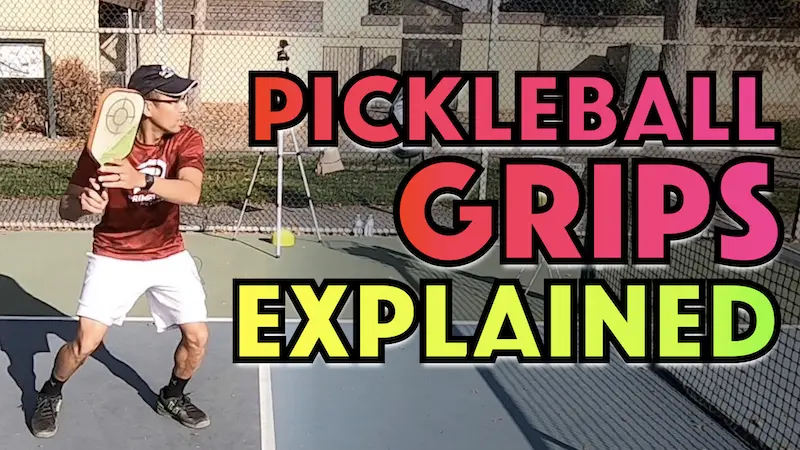
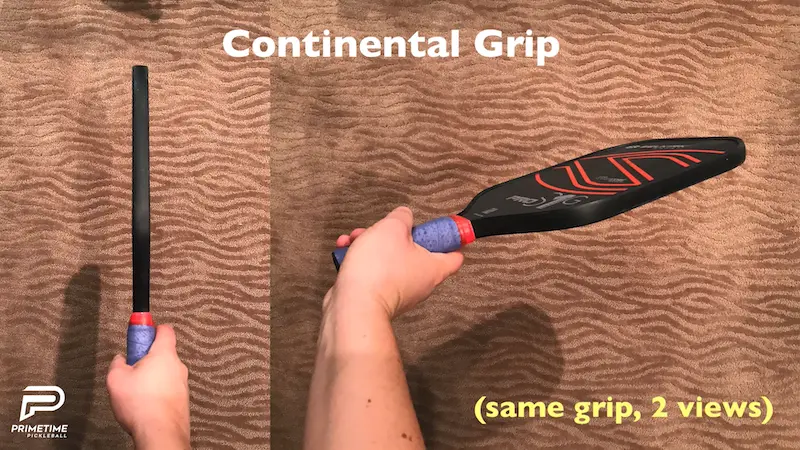
The appropriate way to hold the paddle is with a continental grip. I’m going to set the paddle low and out in front or slightly beside me. I’m not starting way behind my body.
From this low and compact position I’m going to then lift up in a smooth motion and hit the ball up. You’ll notice I’m not going to flip my wrist. In fact, I’m not using a lot of wrist, practically none.
You’ll also notice that my paddle is stable and my paddle face is open more to the sky. It’s not closed toward the ground because I’m not going to get that arc over the net if the face is in a closed (downward) position.
So as I’m dinking, I’m really focused on making sure that I contact the ball out in front of my body. We see many players struggle with this so it’s definitely something you’ll want to check about your dink technique and work on getting it more in front if you find that you’re late.
Also, I’m keeping my eye on the ball before, during, and after contact. As mentioned, it’s more of a push motion than a swing so keep that in mind as well. It feels more like you’re guiding the ball than striking it.
Drill
A great drill to do when you’re working on the 3rd shot drop backhand is to start up at the NVZ line. You want to start up at the line because hitting it soft from way back at the baseline especially on the backhand side can be a real challenge so you’ll want to work your way back to that.
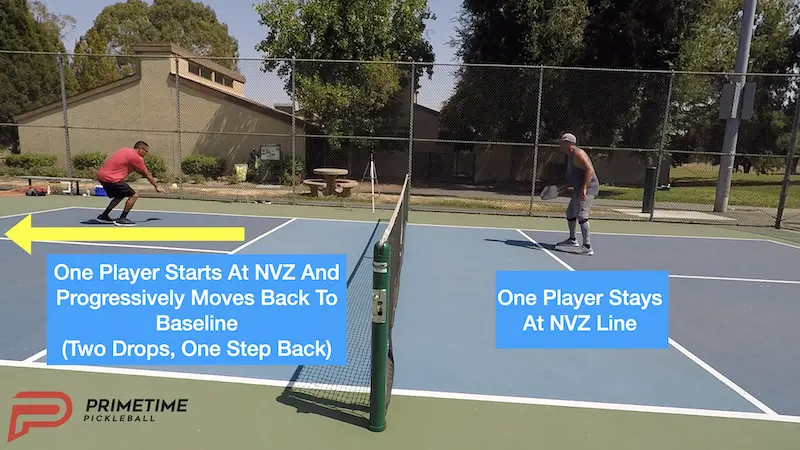
I hit two shots from just behind the NVZ line with my backhand, so two backhand dinks and then I take one big step back. Then I hit two from that deeper position and I take another big step back. You do that all the way to the baseline and then you will take a step forward and work you way back up to the NVZ line in this two hit/one step fashion.
You’ll find that there’s a point that you really struggle to make that dink/drop. There’s a certain depth on the court where it becomes hard for you to make that drop consistently. That’s the area where you’ll want to do a lot of work from.
There’s really no point in moving all the way back to the baseline if you are struggling dropping it from a position before that. So, you can work a few from there and then work your way back up to the NVZ line from there as a modified form for the full drill.
Drill that tough spot, once you get it, only then should you start with taking one step back progressively from there and working your way back all the way to the baseline.
Reminders
So there’s a few things that I just want to highlight. I’ve mentioned them before but they are so important so they’re worth repeating because these are the keys to the shot.
Make sure that your feet are in position and that you’re balanced with your weight moving forward into the shot as you hit. You’re more balanced when hitting a third shot with with your dominant leg forward and stepping in with your body weight momentum.
So, really move your feet to get in good positioning for the shot. You don’t want to be reaching way too far and you don’t want to hit it way close to your body because the most control you have is right in the middle where you’re not stretched or jammed. The key to getting that right every time is make sure you move your feet and know the spacing that you want.
We hope you enjoyed this video/blog. Go out there and drill!
Happy Pickeling!
Get our free 3rd shot course here! –> 3rd Shot Drop Course